 BigCommerce
Synchronize Customers
Before we can synchronize customers, some settings need to be done. For more information, see Set Up Customers.
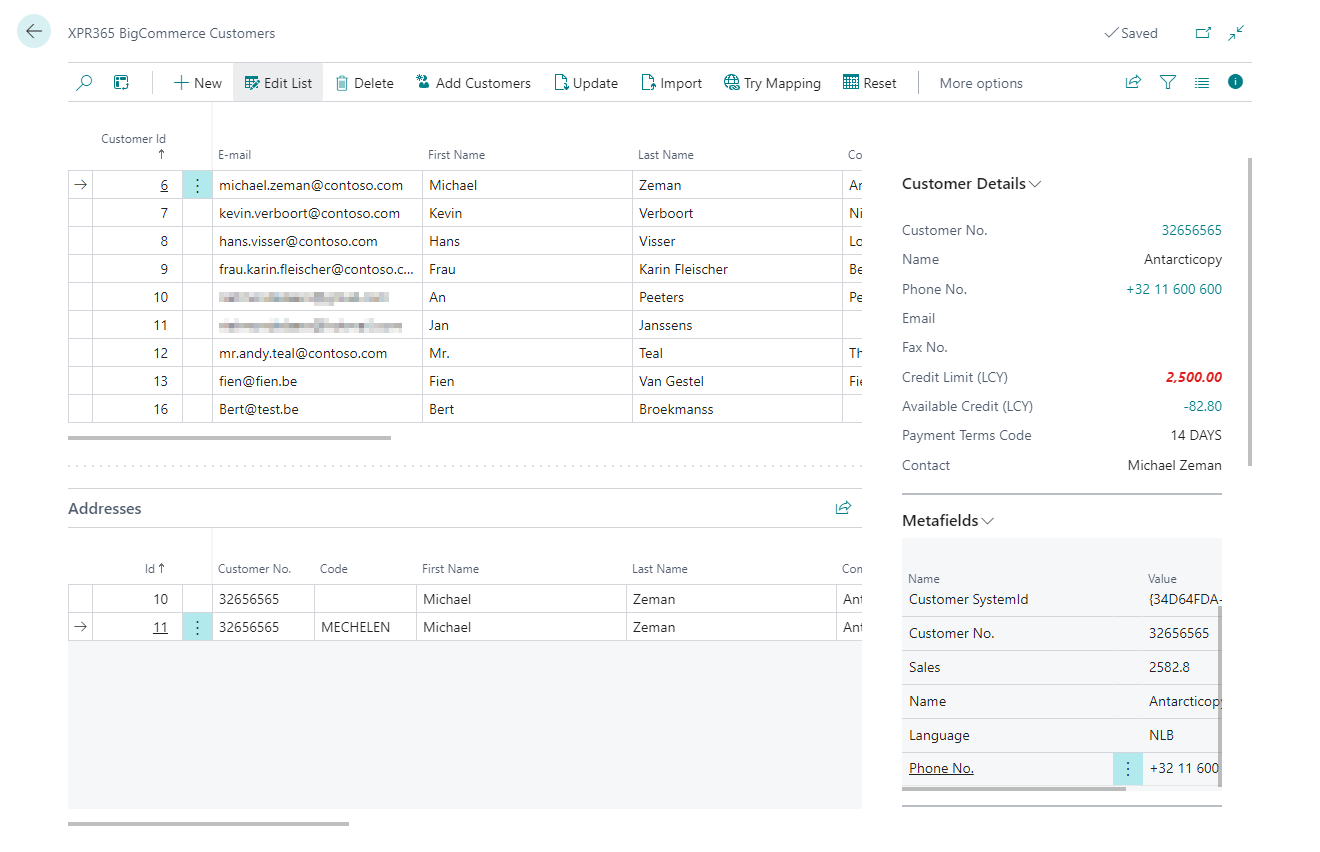
To view BigCommerce customers
- Choose the
 icon, enter XPR365 BigCommerce Stores, and then choose the related link.
 - Open the store you want to view customers for.
- Choose the Customers action.
On this page, you will find an overview of the customers and their addresses. In the Factboxes you can find the customer details, the metafields, the customer attributes, the customer form fields and the address form fields.
To add customers
You can select customers from Business Central and synchronize them to BigCommerce.
- Choose the icon, enter XPR365 BigCommerce Stores, and then choose the related link.
- Choose the Customers action to open the customer list.
- On the XPR365 BigCommerce Customers page, choose the Add Customers action.
- Fill in the fields as necessary.
- In the Store Hash field, select the store you want to synchronize customers to.
- Choose the OK button.
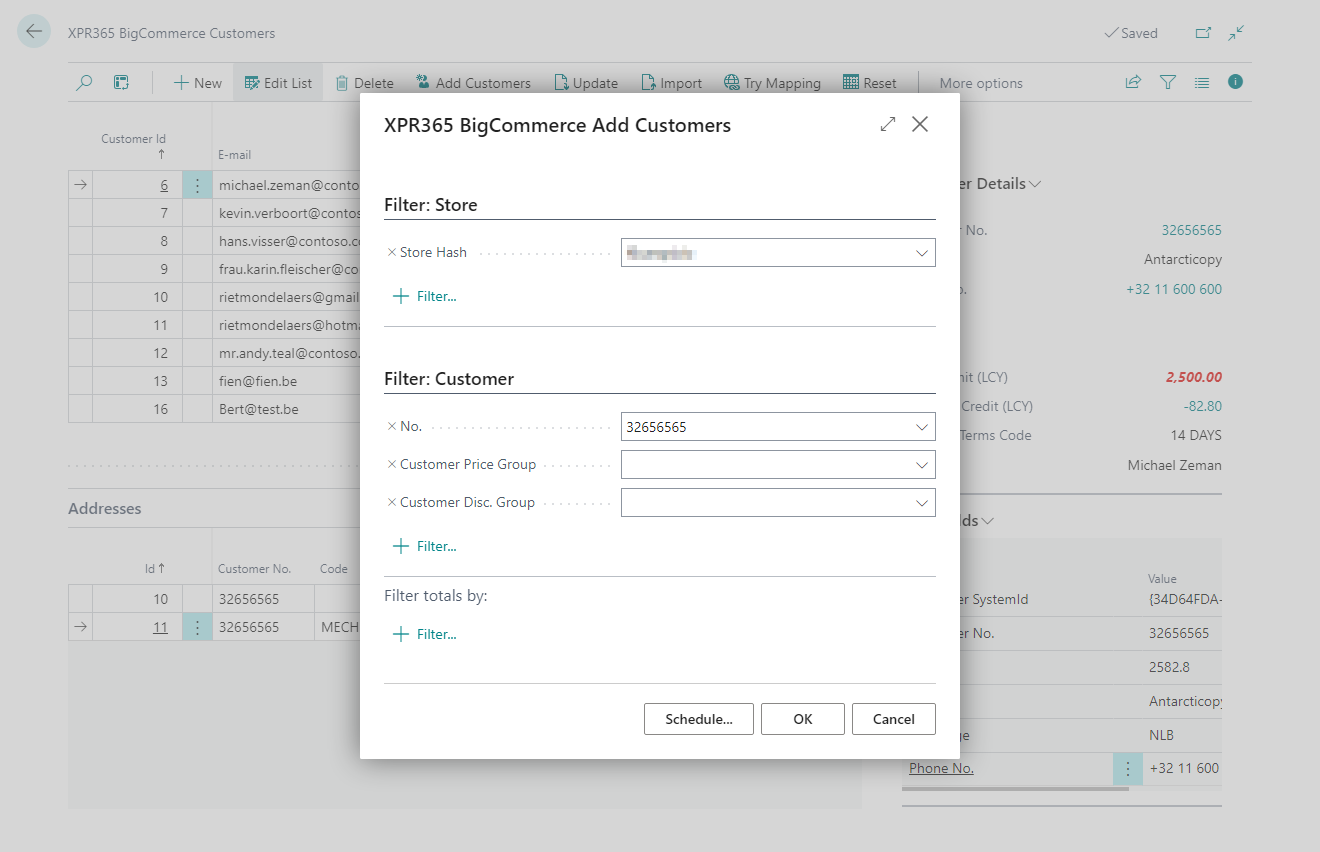
The customers are added to the page and are automatically synchronized to BigCommerce.
You can schedule the task to be performed automatically. Learn more at Schedule recurring tasks
Warning
Customers will only be created in BigCommerce when the fields below are filled in in Business Central.
- First Name and Surname of the primary contact
- Address
- City
- ISO code for the Country/Region Code
To update BigCommerce customers
Customer data that has been modified in Business Central, can be exported to BigCommerce so that the customers are also modified in BigCommerce.
This happens automatically when a customer is modified, but can also be triggered manually.
- Choose the icon, enter XPR365 BigCommerce Stores, and then choose the related link.
- Choose the Customers action to open the customer list.
- On the XPR365 BigCommerce Customers page, choose the Update action.
A background session is started that updates all BigCommerce customers known in Business Central.
To import BigCommerce customers
BigCommerce customers can be imported in Business Central.
- Choose the icon, enter XPR365 BigCommerce Stores, and then choose the related link.
- Choose the Customers action to open the customer list.
- On the XPR365 BigCommerce Customers page, choose the Import action.
You will be asked whether you want to map BigCommerce customers to existing BC customers or create new BC customers if no mapping is found.
The new BigCommerce customers are added to the page and depending on your answer to the question, customers are mapped with existing or newly created BC customers.
Note
Existing Business Central customers will not be changed when importing new or updated BigCommerce customers.
To map customers
When importing BigCommerce customers, you need map these customers with Business Central customers. This can be done manually or by executing a task.
- Choose the icon, enter XPR365 BigCommerce Stores, and then choose the related link.
- Choose the Customers action to open the customer list.
- On the XPR365 BigCommerce Customers page, choose the Try Mapping action to map the selected customer to a Business Central customer. If no mapping is available, a customer is created in Business Central based on the settings made.
The mapping is based on the following data:
- Phone
- Metafields
- Attributes
- Form fields