 BigCommerce
Synchronize Orders
BigCommerce orders can be imported into Business Central and converted to sales orders or sales invoices.
Before we can synchronize orders, some settings need to be done. For more information, see Set Up Orders.
To synchronize BigCommerce orders
The following procedure describes how to import and update BigCommerce orders.
- Choose the
 icon, enter XPR365 BigCommerce Stores, and then choose the related link.
 - Open the store you want to synchronize orders for.
- On the XPR365 BigCommerce Orders page, choose the Import action.
- Fill in the fields as necessary.
- In the Store Hash field, select the store you want to synchronize products to.
- Choose the OK button.
The BigCommerce orders are being imported.
You can schedule the task to be performed automatically. Learn more at Schedule recurring tasks
To view BigCommerce orders
- Choose the
 icon, enter XPR365 BigCommerce Stores, and then choose the related link.
 - Open the store you want see the orders for.
- Choose the Orders action.
On this page, you will find an overview of the BigCommerce orders. In the Factboxes, you can see if there is a link with a Business Central document, the coupons used, the billing form fields, the shipping form fields, and the variant options.


To map orders
When importing BigCommerce orders, mapping is automatically done if you have enabled the Auto Create Sales Docs checkbox. If you have disabled the checkbox, you need to map the customers/companies (B2B) and products manually or by executing a task.
- Choose the
 icon, enter XPR365 BigCommerce Stores, and then choose the related link.
 - Choose the Orders action to open the order list.
- On the XPR365 BigCommerce Orders page, choose the Try Mapping action to map the order data.
To create sales documents
If the Auto Create Sales Docs checkbox is enabled for the BigCommerce store, Business Central tries to create a sales document after the order is imported. If an issue occurs such as a missing customer or product, you can manually create the sales order again after fixing the problem.
- Choose the
 icon, enter XPR365 BigCommerce Stores, and then choose the related link.
 - Choose the Orders action to open the order list.
- Select the order you want to create a sales document for.
- On the XPR365 BigCommerce Order page, choose the Create Sales Document action to create the sales document.
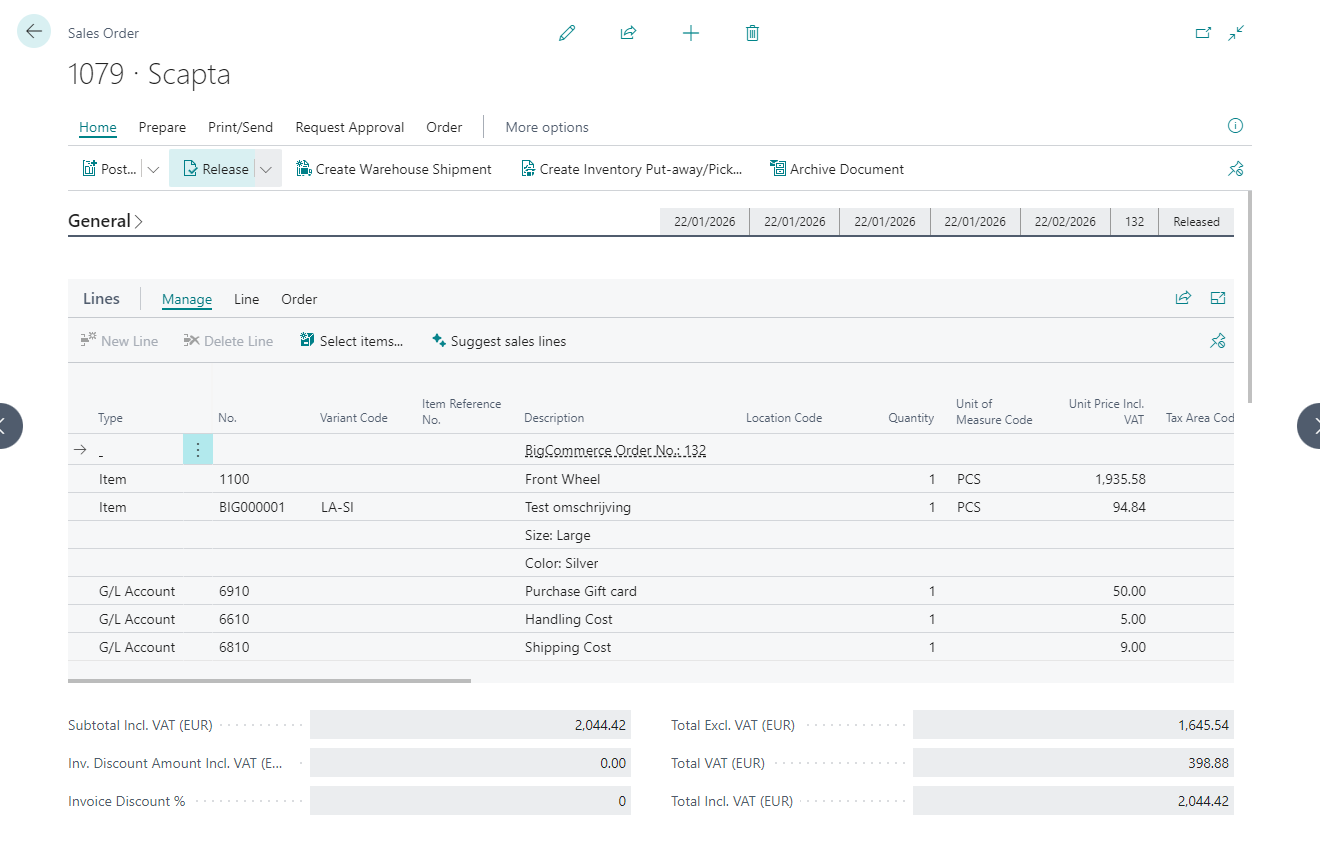
A sales document is created. The linked sales documents are displayed on the BigCommerce Order in the Document Links Factbox.

- When the Order Id on Doc. Line checkbox is enabled, the BigCommerce order id is displayed on the first line.
- Variant options are displayed as a text line when the Options on Sales Doc. checkbox is enabled.
- For shipping, wrapping and handling charges and gift cards, new sales lines are created with the set g/l account.
- When coupons with discounts are used, the discount amounts will be displayed on the sales lines of the relevant item.
The sales document can be managed using standard Business Central functionality.
When the Auto Release Sales Docs checkbox is enabled, the sales document is automatically released. The status of the BigCommerce order changes to Awaiting Shipment.