 Billit
Set up e-documents for purchase
To set up the workflow
To set up a workflow for e-documents, follow these steps.
- Choose the
 icon, enter Workflows, and then choose the related link.
 - Open the Send E-Documents to one service workflow, and then disable the workflow.
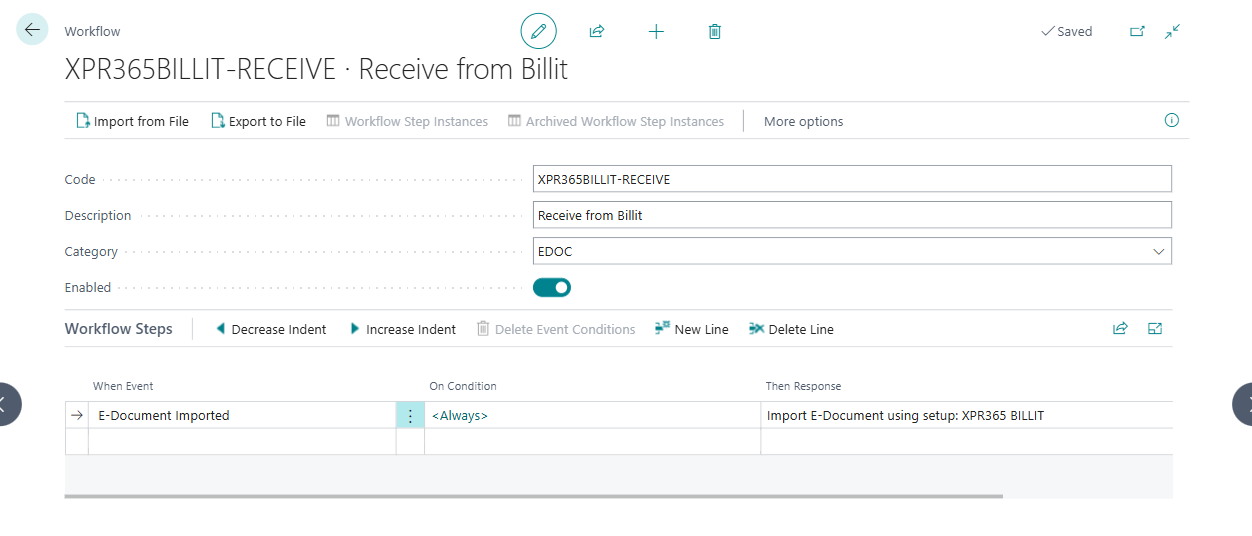
- Open the Receive from Billit workflow to receive documents from Billit.
- In the Then Response field, select the Import E-Document using Setup: ... and select XPR365 BILLIT in the E-document Service field.
- Enable the workflow.
Note
To be able to enable the Billit workflows, disable the Send E-Documents to one service workflow.
To set up vendors to work with different purchase documents
To configure vendors for incoming electronic invoices, you can either select a Purchase Invoice or Purchase Order based on what you want to create from the received e-invoice.
Fore more information, see Set up vendors to work with different purchase documents.
To set up an item reference
If you want to track the inventory and use lines from your vendor invoice to fill in the items on your document lines, you must configure the Item Reference No. value. Map external items with your item numbers by using the item reference list. Fore more information, see use item references.
To map text on an e-document to a specific vendor
If you want to use a specific line from your vendor invoice that was directly posted to the general ledger (G/L) account, you must configure the Mapping Text value. To bypass this error when using G/L accounts, select the Map Text to Account action to create a specific mapping of the Mapping Text value with the Debit Acc. No.. Learn more at account mapping.
To set up default g/l accounts
Specify the G/L account that is automatically inserted on purchase lines that are created from electronic documents when the incoming document line does not contain an identifiable item. Any incoming document line that does not have a GTIN or the vendor's item number will be converted to a purchase line of type G/L Account, and the No. field on the purchase line will contain the account that you select in the G/L Account for Non-Item Lines field.
- Choose the icon, enter Purchase & Payables Setup, and then choose the related link.
- On the Default Accounts FastTab, select the debit account in the Default Debit Account for Non-Item Lines and the credit account in the Default Credit Account for Non-Item Lines field.
To set up a tolerance
If you want to add tolerance and allow the difference between lines in e-invoice and purchase order, follow these steps:
- Choose the icon, enter Purchase & Payables Setup, and then choose the related link.
- Allow tolerance in the E-Document Matching Difference % field by specifying the maximum percentage of cost difference to allow when matching an incoming e-document line with a purchase order line.
- This setup applies to all the matching lines, but considers the tolerance for the total amount, as for Direct Unit Cost together with applied Line Discount %.
- Close the page.
To set up Copilot Matching
There are two ways to match lines. One way is to do it manually. The other way is to use the E-document matching assistance with Copilot. The E-document matching assistance feature helps you match received electronic invoices with existing purchase order lines by using large language modules (LLM) model. Learn more about Using Copilot.
- Choose the icon, enter Purchase & Payables Setup, and then choose the related link.
- Enable the E-Document Learn Copilot Matchings checkbox.
Note
This article is prerelease documentation from Microsoft and is subject to change.