 Billit
Set up e-documents
To be able to use XPR365 Billit, some settings need to be made.
To set up an e-document service
To set up an e-document service, follow these steps.
- Choose the
 icon, enter E-Document Services, and then choose the related link.
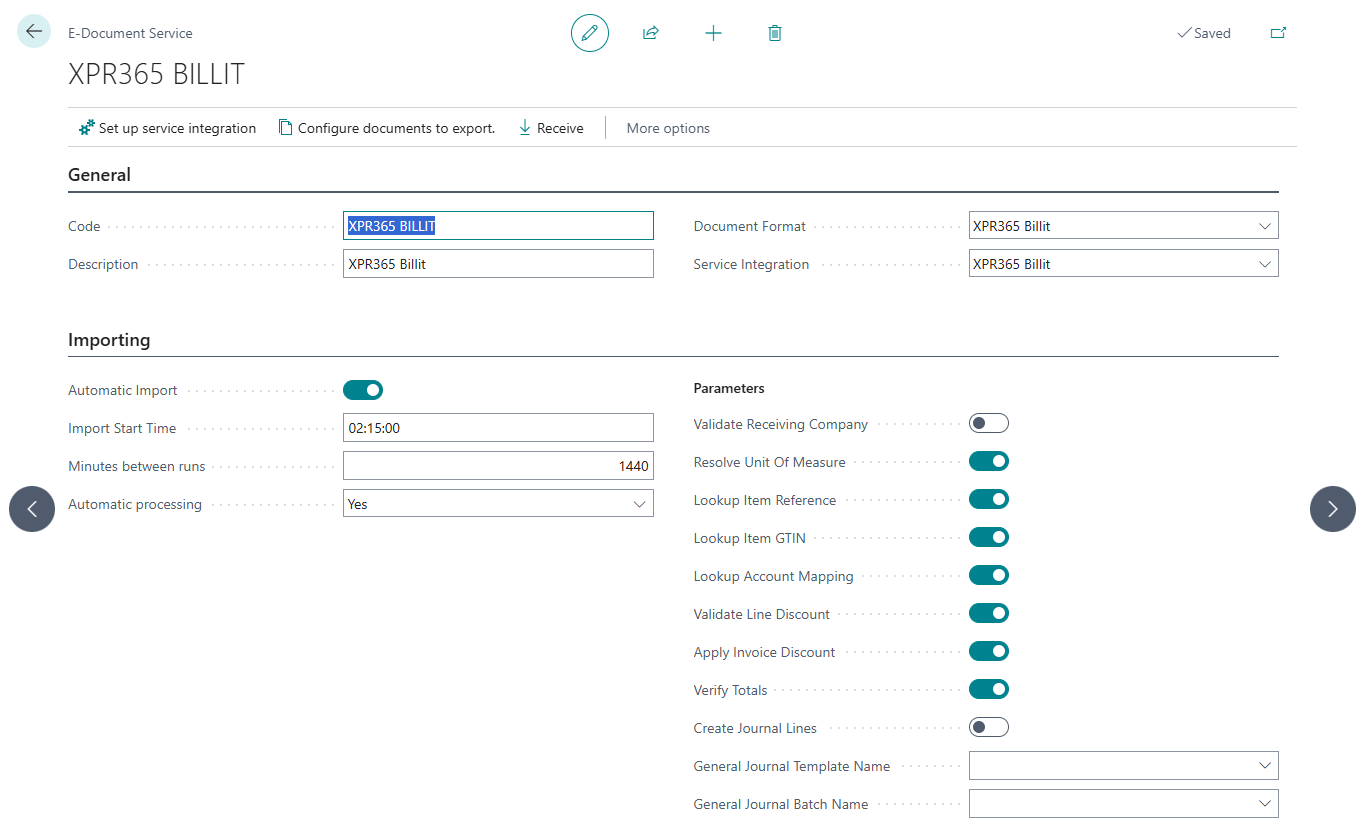
 Select New, and then configure the fields on the General FastTab as described in the following table.
Field Description Code Select the electronic export setup code. Description Enter a brief description of the electronic export setup. Document Format Select the export format of the electronic export setup. Select XPR365 Billit as format. Service Integration Select the integration code for the electronic export setup. Select XPR365 Billit as service integration. On the Importing FastTab, configure the fields as described in the following table.
Field Description Automatic Import Specify whether a background job automatically imports documents from the service. Import Start Time Specify the start time for automatic import jobs. This field is available only when Automatic Import is enabled. Minutes between runs Specify the number of minutes to wait between runs of the automatic import job. This field is available only when Automatic Import is enabled. Automatic processing Specify whether to automatically create a purchase document based on the received e-document. If you choose No, Business Central creates the e-document, but you must review its details before creating the purchase document. Verify totals when posting Specify if document totals are checked when posting document. Please leave the other fields as default.
To set up service integration
- Choose the icon, enter E-Document Services, and then choose the related link.
- Open the E-document Service for Billit.
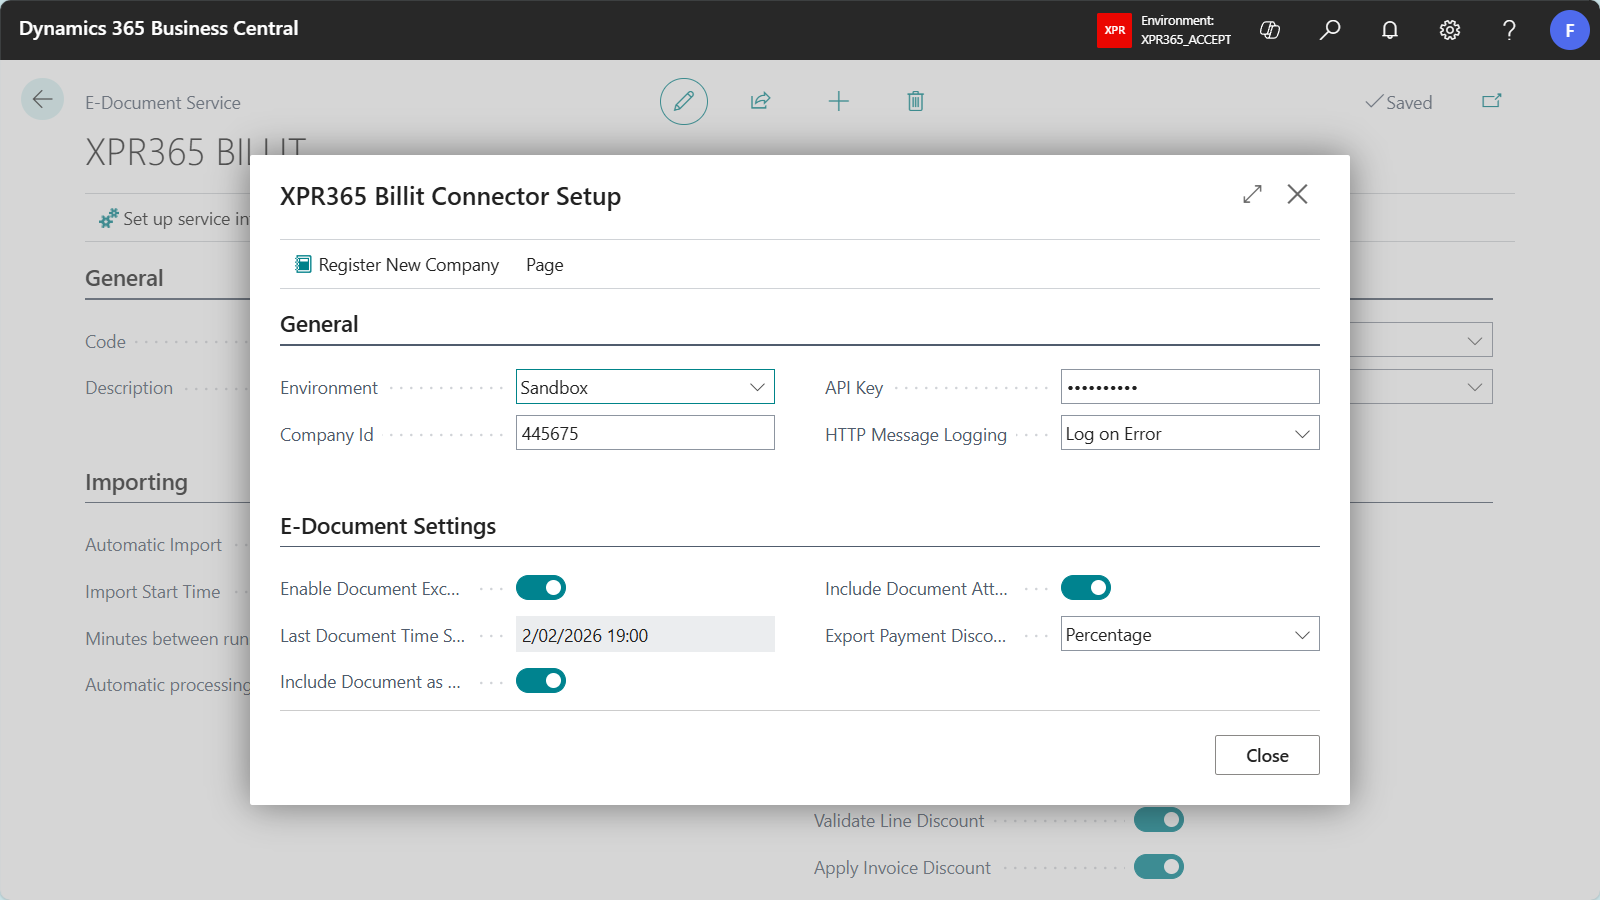
Select the Set up service integration action to configure authentication and connection settings for your integration connector as described in the following table.
Field Description Environment Specify whether you integrate a sandbox or production environment. Company Id Specify the Billit company id you want to integrate with. API Key Specify the API key of the Billit company. HTTP Message Logging Specify if you want register log entries. Enable Document Exchange Specify if the document exchange is enabled for this company. Last Document Time Stamp Specifies the last document time stamp for the Billit API. When you retrieve documents from Billit for the first time, you specify the date from which documents can be retrieved. Include Document as PDF Specify whether you want to send a PDF file of the document you send to the customer via Peppol. Include Document Attachments Specify whether you want to include attachments with the document you send to the customer via Peppol. Export Payment Discount By Specify if the payment discount should be exported to Billit as percentage or amount. Note
When exporting payment discount by amount, you get 2 additional lines of type allowance charge per VAT %.
Example: 2% Payment discount exported as payment discount amounts
Description Unit Price Quantity Payment Disc. Amount VAT % Line Amount Item 1 100.00 1 2.00 21% 100.00 Item 2 50.00 4 4.00 6% 200.00 Total Excl. VAT 300.00 Total VAT 32.34 Total Incl. VAT 332.34 This will be translated to Billit & UBL:
Description Unit Price Quantity VAT % Line Amount Item 1 100.00 1 21% 100.00 Item 2 50.00 4 6% 200.00 Cash discount -2.00 1 21% -2.00 Cash discount 2.00 1 0% 2.00 Cash discount -4.00 1 6% -4.00 Cash discount 4.00 1 0% 4.00 Total Excl. VAT 300.00 Total VAT 32.34 Total Incl. VAT 332.34
Note
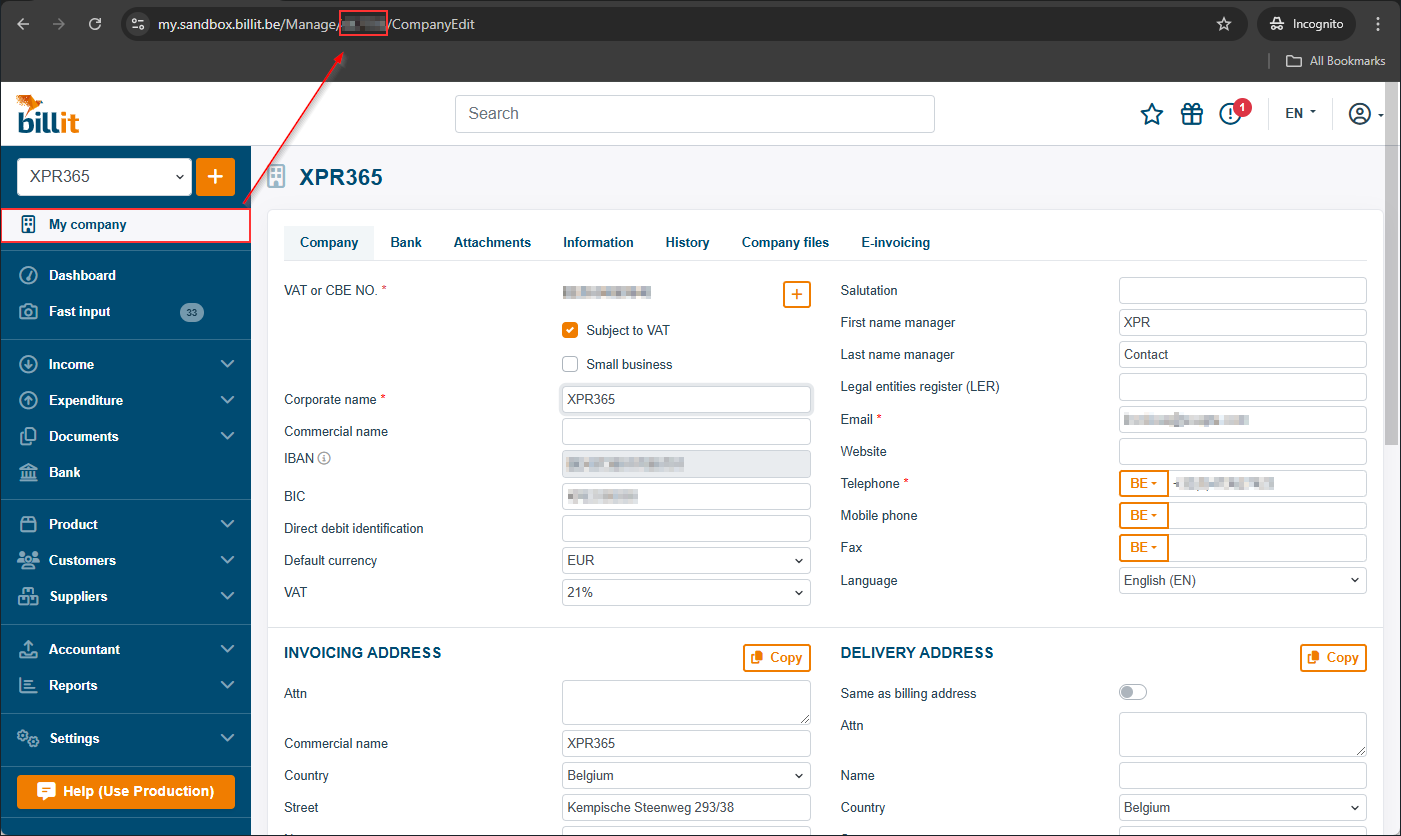
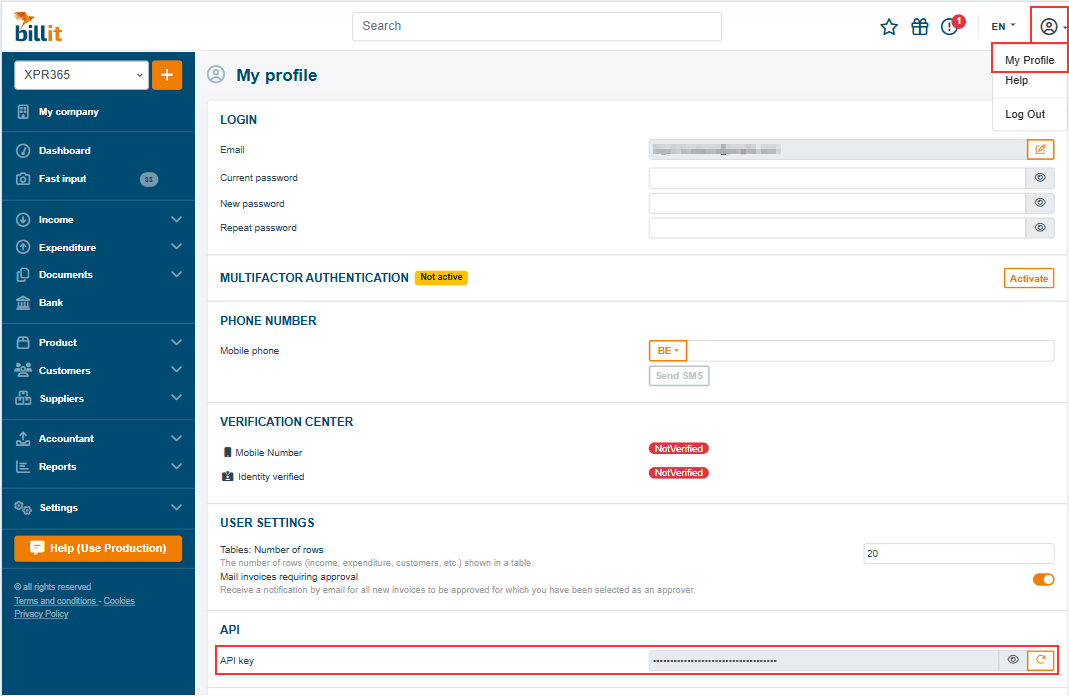
The Company Id and API key can be found on the Billit Setup Page.
- Login to the admin portal of Billit (my.billit.be or sandbox.my.billit.be).
- Select the company you want to register.
- You can find the company ID by navigating to My Company. Copy the Company ID from the URL.
- You can find the API key in My Profile in the API key field. Copy the API key.
Choose the Register New Company action to register a new Billit company.
To register a company with Billit, you must first fill some of the basic company details.
- Name
- Address
- City
- Post Code
- Country/Region Code
- Contact Name
- Bank Name
- Bank Branch No.
- Bank Account No.
- IBAN
- SWIFT Code
- Enterprise No.
Note
- When you register a new company you have to indicated whether you need a sandbox or a production environment. A company will be created in Billit based on the environment you have selected.
- The welcome email and password from Billit will be sent to the email address configured in the company information. Make sure this is correct. This can be changed again after creating the company in Billit.
- It is checked whether the email address with which you create a new company at Billit is a Microsoft email address.
Important
When you register a new company, it is neccessary to
- complete the KYC (Know Your Customer) procedure of Billit to use Billit safely. For more information, see Complete KYC Procedure.
- verify your identity via itsme in Billit. For more information, see Verify identity.
- Register your company on the Peppol-network in Billit. Fore more information, see E-invoicing.
Other E-document configurations
- Choose the icon, enter E-Document Services, and then choose the related link.
Select the actions below.
- Configure documents to export
Set up the document types the framework exports using this service.
The document types are automatically filled in when installing XPR365 Billit. Supported document types are: Sales Invoice, Sales Credit Memo, Service Invoice and Service Credit Memo. - Export mapping setup
Configure simple value mappings for export processes. - Import mapping setup
Configure simple value mappings for import processes. - Receive
Manually trigger the receipt of new e-documents from the integration service.
- Configure documents to export